La Vie de Miccah Marie
my thoughts on life, love, faith, and motherhood
Homemade face masks

We’re living in a weird time right now. This is the stuff that we tell our grandkids we lived through. They’ll roll their eyes and say, “You’ve told me that story already,” but it will be worth hearing again. Until we get to the other side of this pandemic, it’s going to take some time. Thankfully, the weather is getting warmer, and we can start to feel some sunshine on our faces. After a few days cooped up inside with a 2 and nearly 4 year old, the sun is a welcome sight.
Since the CDC is now recommending face masks for anyone heading outside, you just need to have something covering your face that is more substantial than a scarf or bandana. I’d been wanting to make some face masks for ourselves and to share. Before turning on my sewing machine, I read dozens of how-to blogs and then sort of came up with a Frankenstein version of a mask using material I had at home and a no-fuss way of making them. I’m talking just using a button stitch to sew on the ear straps, and making the 3 folds without measuring! I’m not a fabulous seamstress, so these take me about an hour to make one. I think they will go much faster if you do an assembly line, cutting out the material and the wire all in advance, and have your iron on. My favorite material to use are called “fat quarters.” They’re cotton scraps, usually sold in bundles of 5, as coordinating material at any craft store. They’re great because they’re in manageable sizes and are fun, colorful prints. Let’s face it. Having to wear a mask is not really anyone’s idea of accessorizing. However, if you have to wear one, it may as well be a happy pattern. I wanted to make a mask that was 4 layers, so I landed on 100% cotton muslin as the middle layer, in the form of my organic cotton swaddling blankets I used for both my girls. Since I really have no use for those swaddling blankets anymore, I figured, at least the material is going to good use. I had seen a few other mask how-to’s using iron-on fusible interfacing as the middle layer for the mask, but I just don’t feel like breathing in anything with glue on it is a good idea.
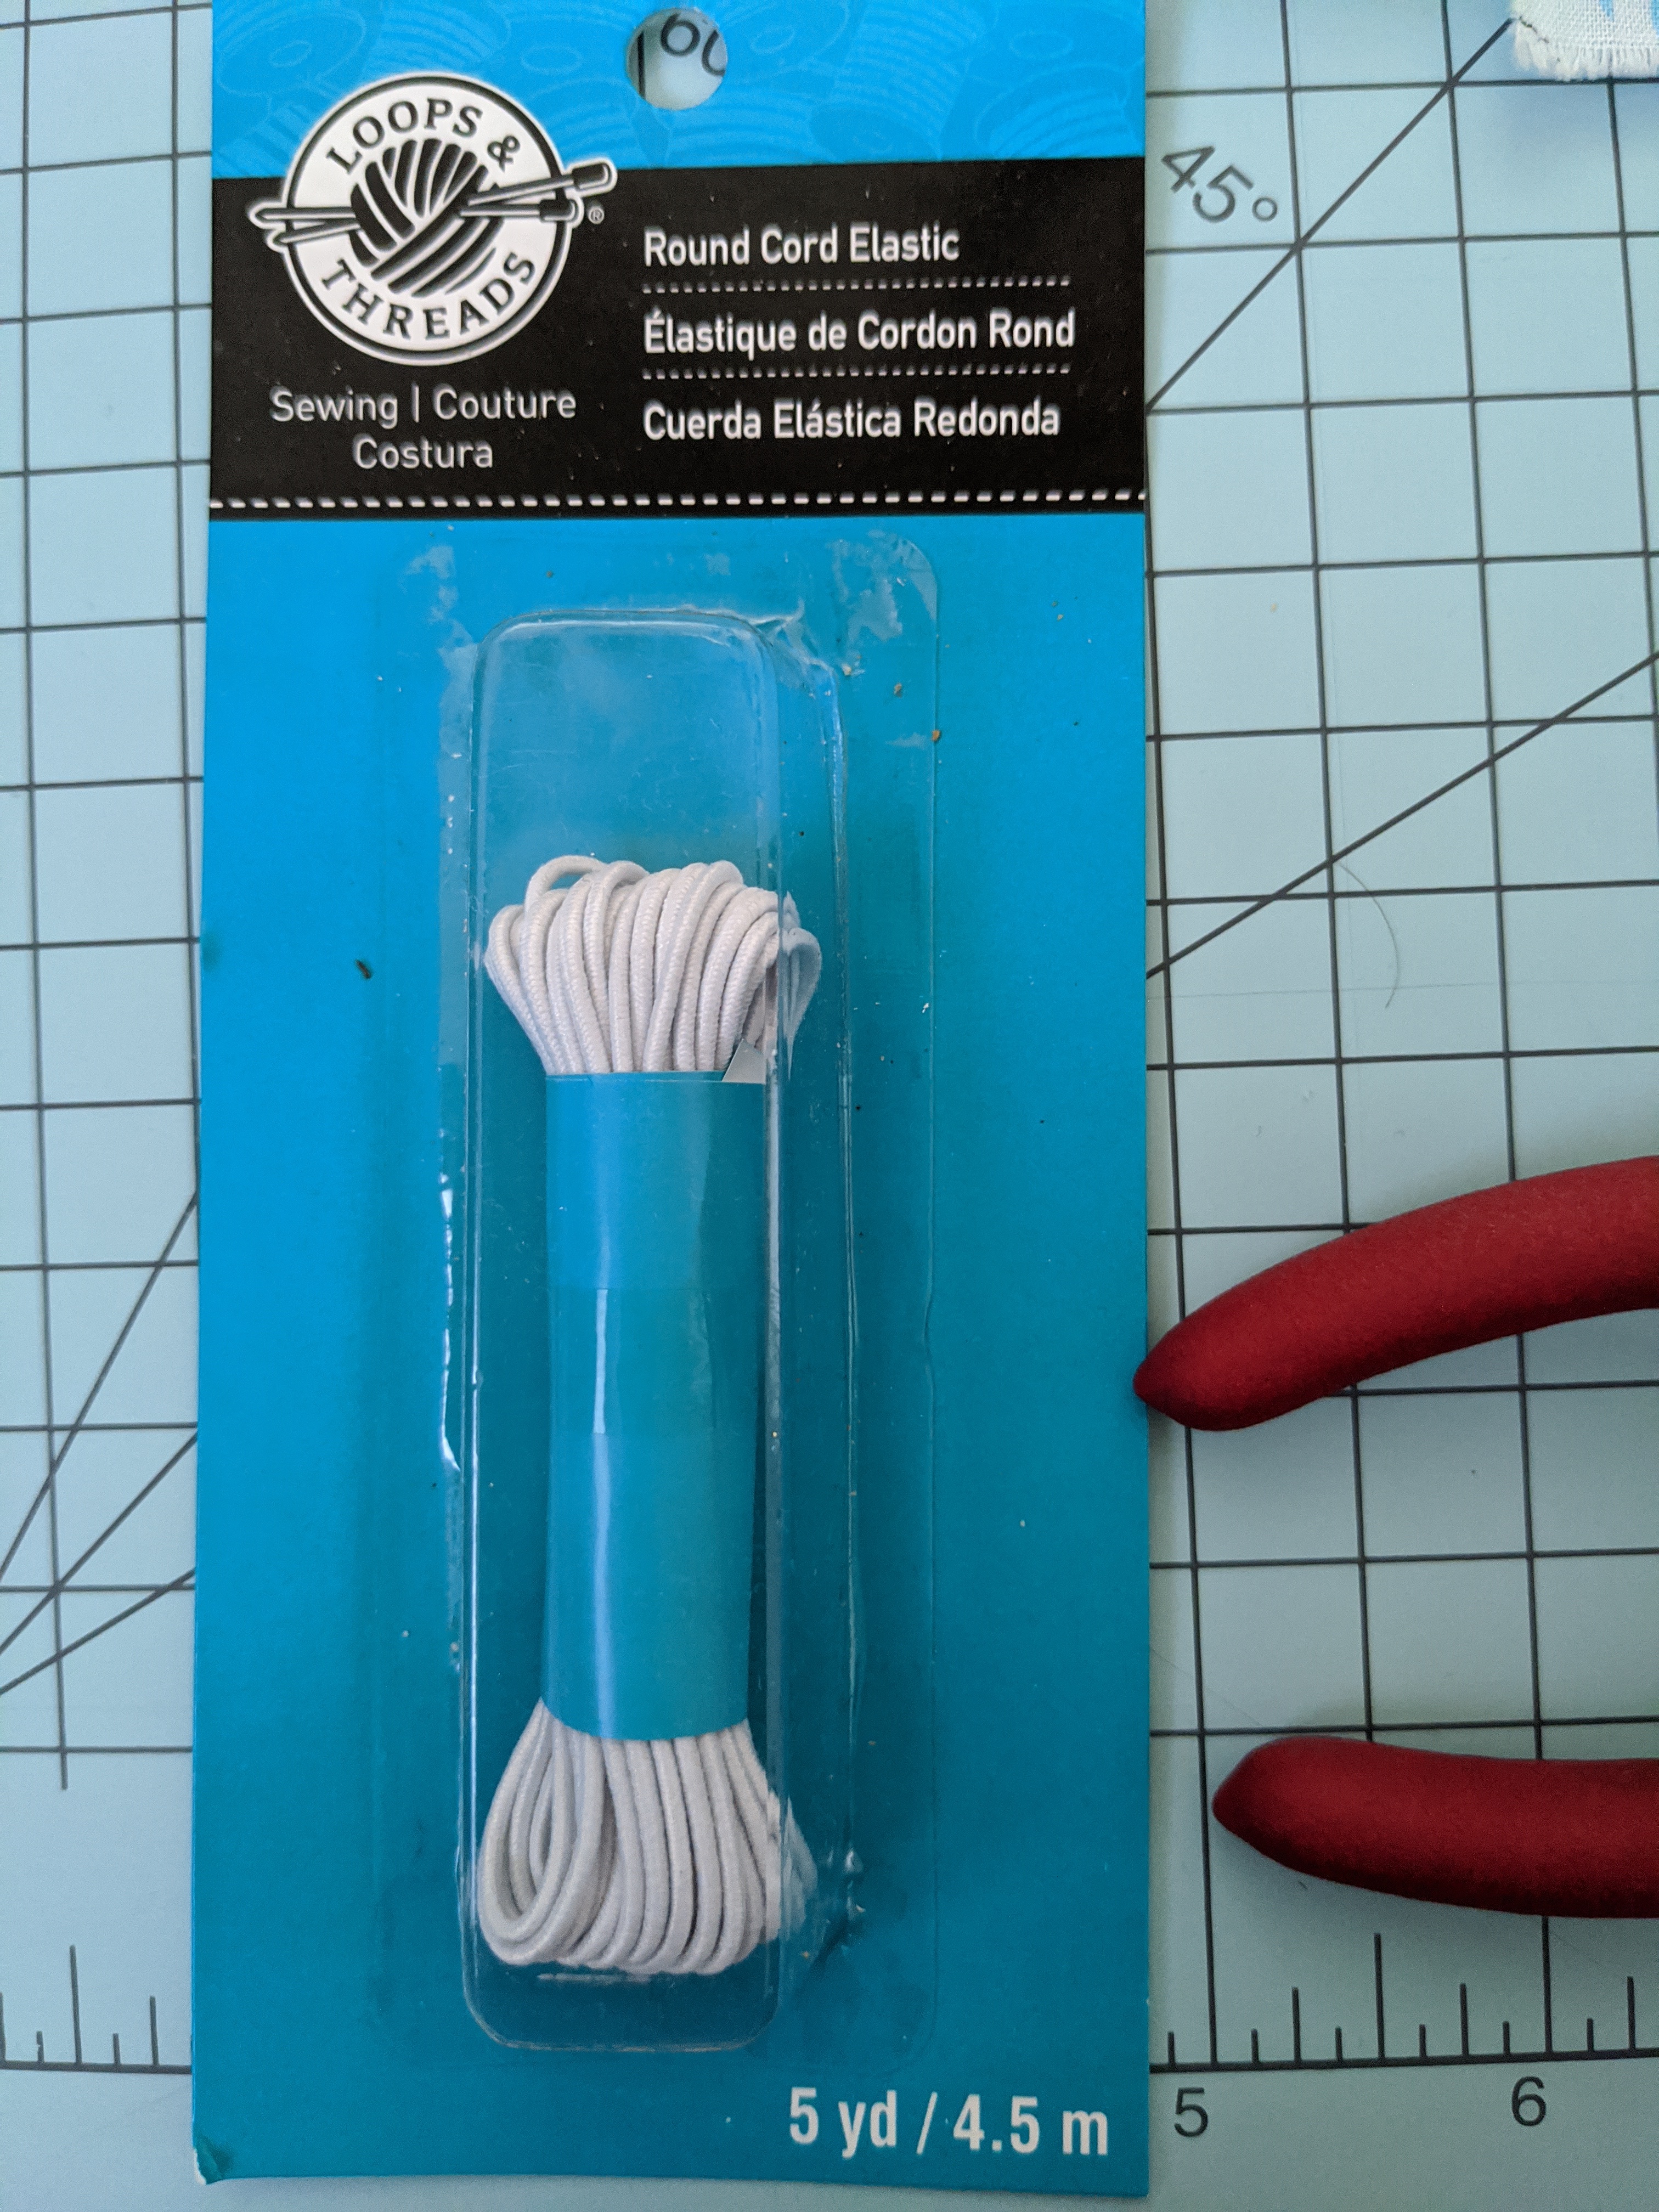
Here are the materials you’ll need: Fat quarter cotton fabric (or just cotton fabric or cotton blend of any kind), 100% cotton muslin (mine are Aden + Anais swaddle blankets), elastic cord (I’m currently using the cord, but I am nearly out, so ordered 1/4″ flat elastic on Amazon), coated hanging wire (you could also use pipe cleaners). Other things you’ll want is an iron, a rotary cutter to cut your fabric, a cardboard box cut to make your pattern (everyone has an Amazon box or two laying around), a self-healing mat to cut the material on, and needle nose pliers to cut and bend the wire. This is a great article showing some research that went in to testing materials for DIY masks. https://smartairfilters.com/en/blog/best-materials-make-diy-face-mask-virus/


I need to throw out some disclaimers here. This is NOT meant to say you will not contract or spread COVID-19 by wearing these masks. You MUST wash your hands regularly with soap and DO NOT touch your face. If you wear this mask in the grocery store and touch your mask after touching your grocery cart, wash the mask when you get home. Do not share your mask with anyone, at least without first washing it. Wash your material and press with an iron before starting this project. If you have a mesh bag for washing delicates, I’d suggest washing your mask in that.
Everyone’s faces are different sizes. I’ve come up with 3 sizes that work for us in our house. Small, medium, and large. Small fits my 3 year old, medium fits me, and large fits my husband.

Step 1: If you plan to make more than one mask, make a template with cardboard or heavy cardstock. Then, cut out your inner and outer material using the sizes below
- Small: 7×9.5″
- Medium: 8×11″
- Large: 9×12″
Step 2: Cut out your ear straps. You’ll need two of each
- Small: 5″
- Medium: 7″
- Large: 9″

Step 3: Cut the coated wire. For all mask sizes, the wire should be 5″ long, and bend in half so it’s 2.5″
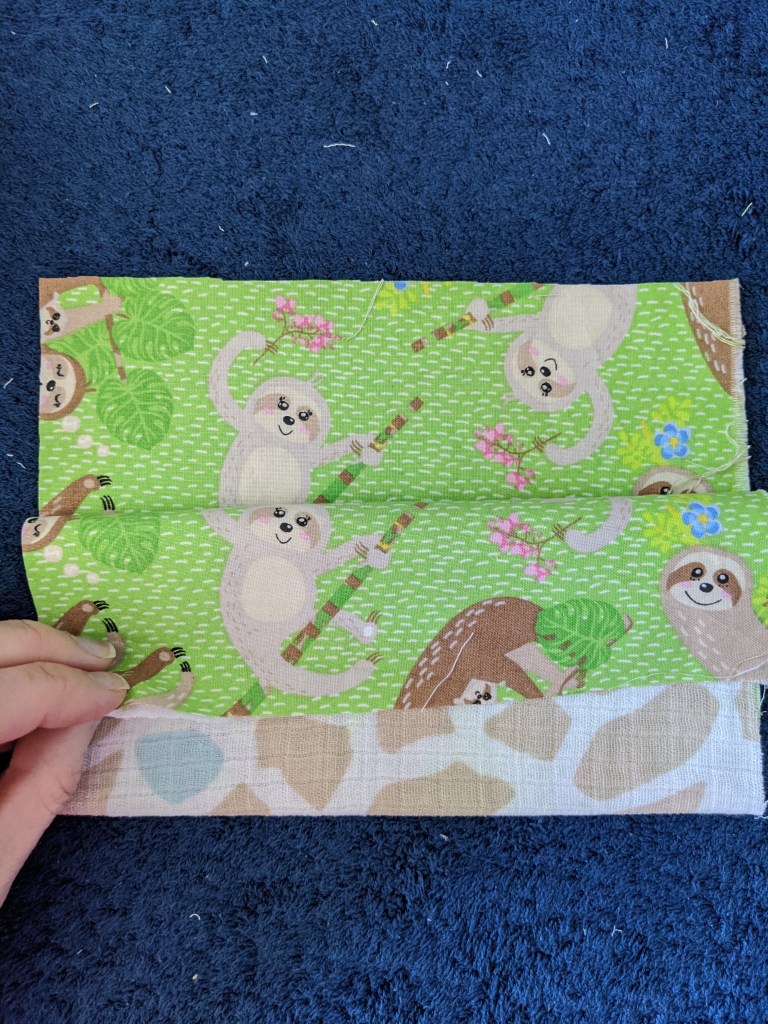
Step 4: Press the inner and outer material flat. Match up the rectangles with the inner material on the bottom and the outer material on the top. Fold so that the short sides are together, and press. In this pic, the outside of the mask is the sloth material.

Step 5: Sew around the short sides and the open long side of the rectangle, using a 1/4″ seam allowance. You don’t need to sew the folded side. Leave a 3″ opening at the top, and backstitch around each side of the opening. Once sewed, turn right-side out and press flat.


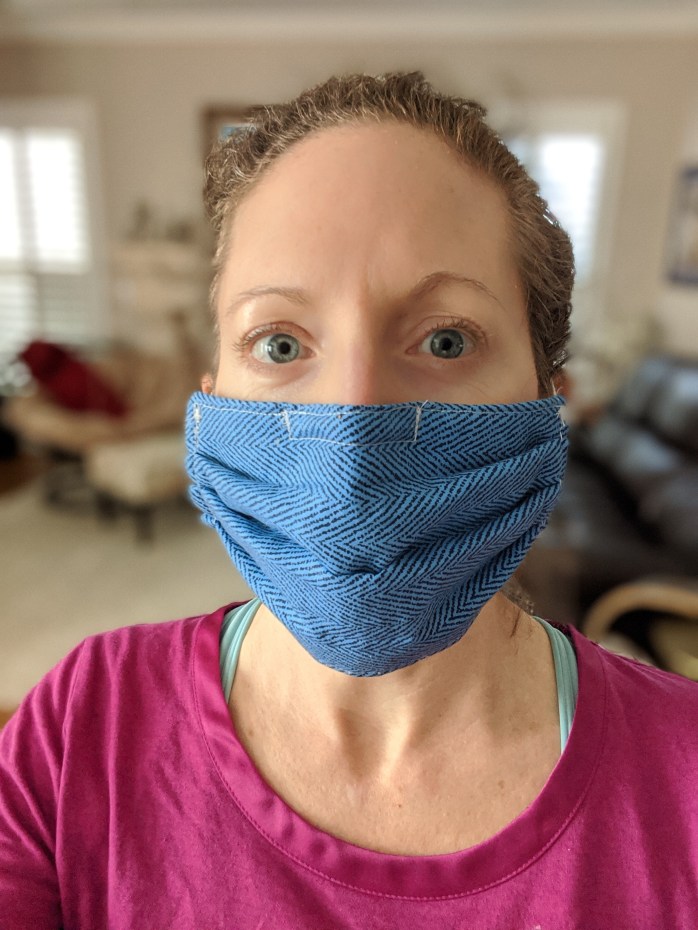
Step 6: For the first fold, start with the opening at the top. Pinch the material in the middle and fold down. The folds should be no more than 1/2″ Press to lay flat. You can pin into place if you like.

Top fold 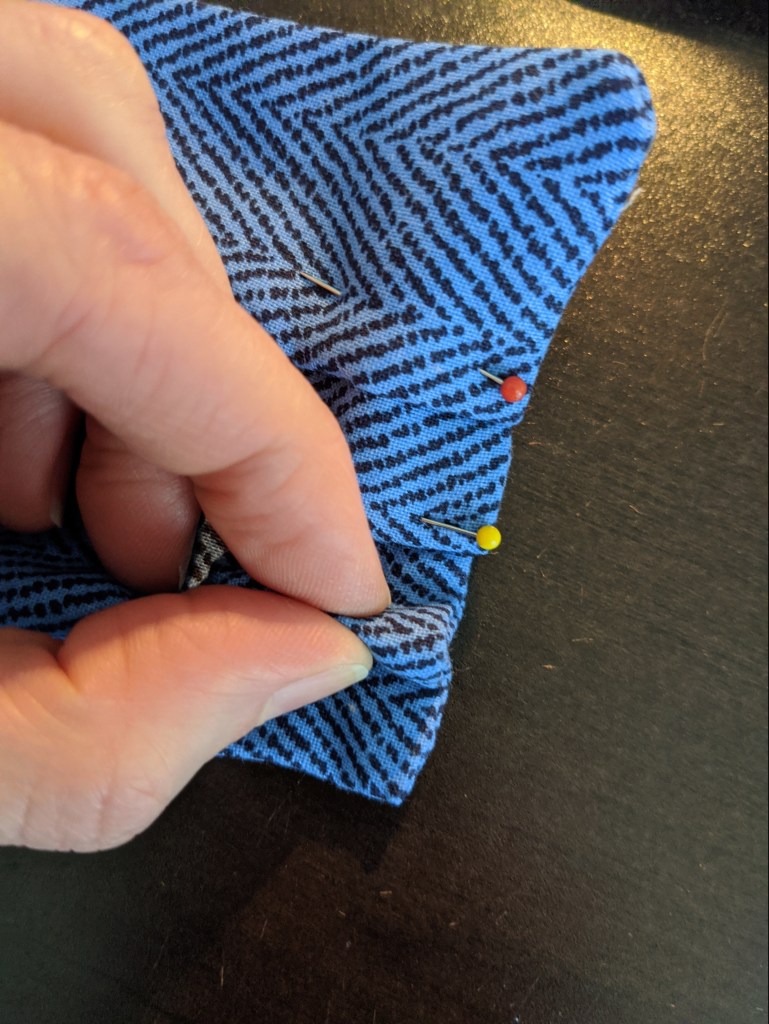
Bottom fold 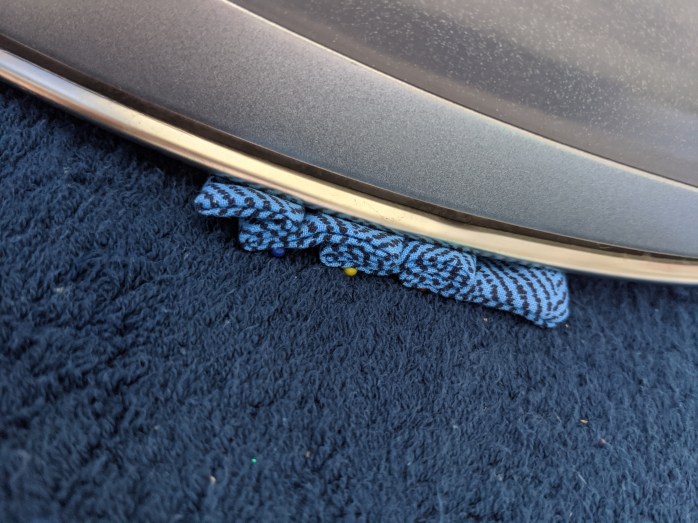
the folds look like waves 
All 3 folds, the opening is at the top.
Step 6: Make folds 2 and 3. Pinch the material halfway from the top (opening side) to the top of the middle fold. Fold down. This fold should be just above the first fold you made. For the 3rd fold, pinch halfway between the bottom of the material and the bottom of the middle fold. Press all folds flat, and pin if you need. The three folds should be right next to each other, and look like waves.

Sewing the left side of the mask 
Sewing the right side of the mask
Step 7: This may be a bit non-traditional, but I sew with the material both to the left and right sides of the needle, so that your presser foot is going with the wave, not against. You’ll sew two different times, keeping that opening open, so that you can put the wire/pipe cleaner in later. For the right side of the mask, start your needle at the top of the mask, the far left side of the opening, backstitching and running down the right side of the “waves” and then around the bottom of the mask, backstitch to stop at the bottom left corner of the mask. Then start your needle for the left side of the mask at the far left side of the opening, and then sew over the waves on the left side, meeting the backstitches.

Step 8: Time to add the nose wire. Sew a rectangle encasing the wire. You may need to sew less than 1/4″ at the top so you don’t run over the wire with your needle.

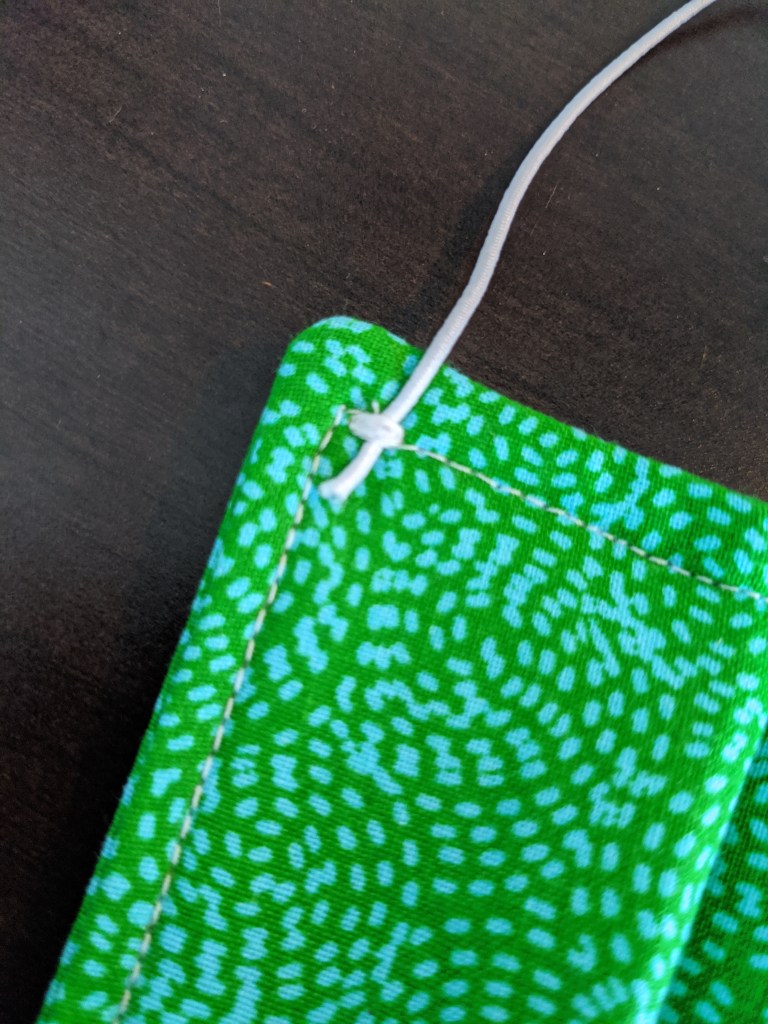

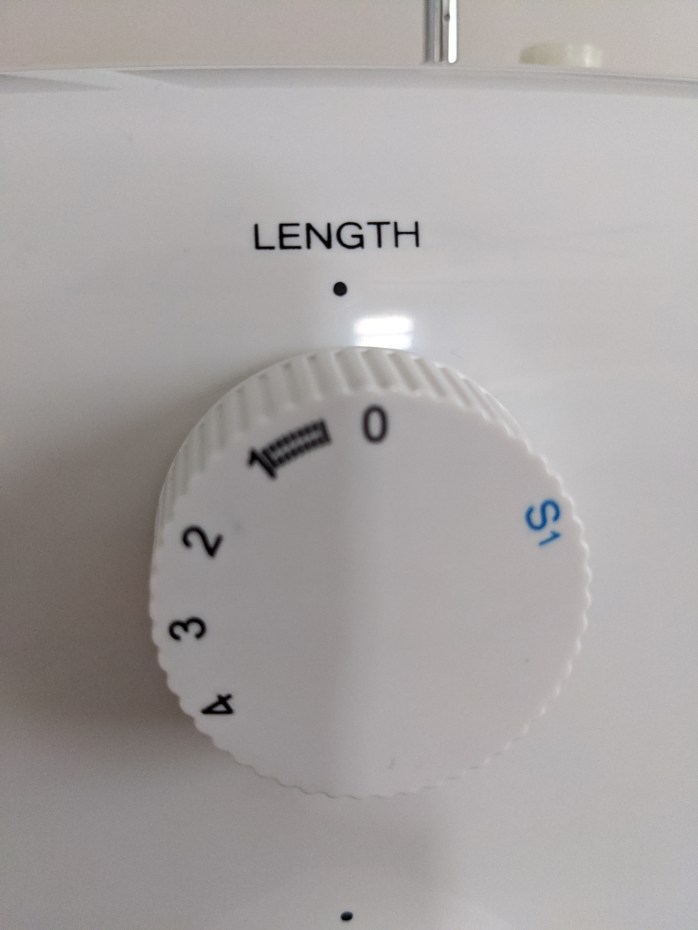

Step 9: Last step! Sew on your ear straps. You will be sewing the straps on to the side that you put to your mouth and nose, the folds point down against your mouth and point up on the outside. Switch out your presser foot to a button foot, change your stitch type to a zigzag, change your length to 0, and width start at 0. Sew on your elastic strap to the stitches you already sewed on the sides of your mask, 1/4″ in from the corner, bring in the ends about 3/4″ from the edge. With your width at 0, sew a few stitches then toggle your width so that the needle goes on either side of your elastic cord, and then so that the needle goes through the middle of it, finish with a few more stitches at 0 width. Voila!
The MOPS blog article I wrote entitled Love Times Two

The Laughing Gateau

