La Vie de Miccah Marie
my thoughts on life, love, faith, and motherhood
Shark/Mermaid tail blanket

Mermaid tail blankets have been all the rage. But they’re stinking expensive if you try to buy one already made! I not only have three nieces, I also have two nephews. I’m pretty sure neither of those boys would be thrilled with a mermaid blanket. But a shark blanket? YES. Honestly, these blankets are super easy to sew together. You’ll need to first draw your pattern on some wrapping paper. In this blanket’s simplest pattern, you’ll have three pattern pieces to cut out. You’ll have the body, the tail fin (in which your kid’s feet will fit), and the top, or mouth. Depending on how big you want your blanket will determine how much material to get. I like the warmth and feel of anti-pill fleece fabric. If you’re making a shark or other animal like this example, I bought some starchy felt that had a sticky peel-off backing for the eyes and teeth.

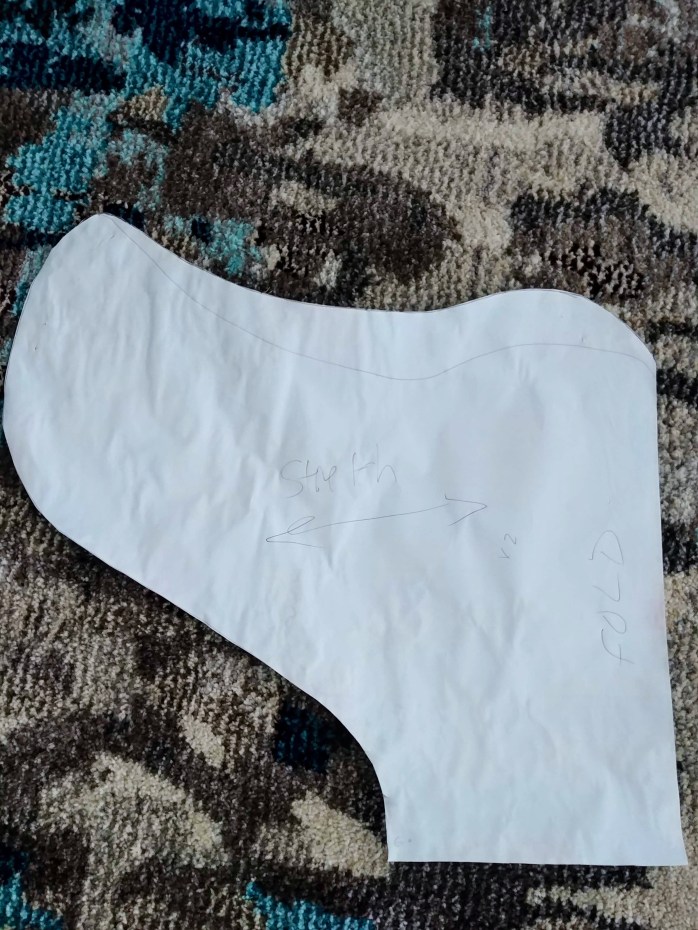
To make the body pattern, either have your kid lay down on the paper to measure how long the blanket needs to be, from armpit to ankles, or use your own legs. Since this is a blanket, you want to make it roomy. Draw just one side of the body so that when you fold it over, the sides match and look the same. I made my body pattern 45″ long and 13″ wide. The skinny end is 7″ wide, but you’ll want to make sure that will accommodate your kiddo’s ankles. To help you cut out the material correctly, write on the pattern. Your material should stretch widthwise, and you will want the fold of your material on the straight long edge. You will cut 2 on the fold, so that when you finish cutting, you will have a front and back body of your blanket that is 26″ wide at its widest point and 14″ wide at the ankles.

For the fin, again, you will only draw one side so that when you cut on the fold, the tail fins are mirror images. Ensure that the material stretches the width of the fin, and the fold is the length. The little skinny end at the bottom should be the same with as the skinny end of your body pattern. You will cut 2 of these fins on the fold, again so that you have a whole front and back fin. My fin is 15.25″ at it’s widest point, and 10.5″ at the straight fold. So, when I cut out my material, I would have a fin 30.5″ wide.
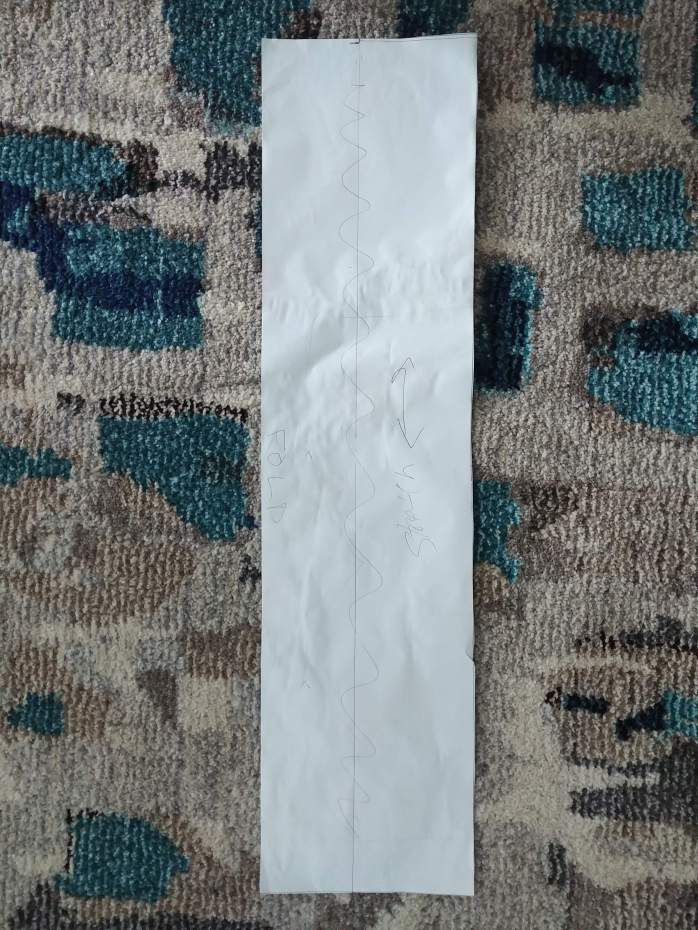
This is the mouth of the blanket. You’ll want the stretch to run the length of the material, and the fold on one of the long sides. Mine is 6″ wide and 26″ long. The length of the mouth should be double the width of the top of your body pattern. So when I cut the material, I would have a 12″ wide, 26″ long strip.
Now that your material is cut, it’s time to piece everything together. First, determine the “right” and “wrong” sides of your pieces of material. The right side is the side that the pattern is intended to be seen. The wrong side is the side you want to be hidden. Next, it’s time to sew your mouth pieces on to the front body piece and on to the back body piece.
- Fold your mouth piece long ways so that it is the longest length (26″ and 6″ wide just like your pattern). If your material is such that you have a preference for which side is the inside of your blanket, make sure you sew the mouth on to the outside (or right side) of the body piece. For your mouth piece, if there is a wrong side, make sure the wrong side gets folded inside, and the right side is what is visible. Match the ends to the top end of the body at it’s widest point, so that the mouth and body should be the same width. The fold of the mouth should be down, and the raw edges of the mouth should be up, matching to the raw edge of the body, so you have three pieces of material to sew together. Sew together about a half inch away from the edge. I used a large zig-zag stitch since the fleece material is pretty stretchy, and make sure you backstitch on both ends. Sew one mouth piece on to each body piece.

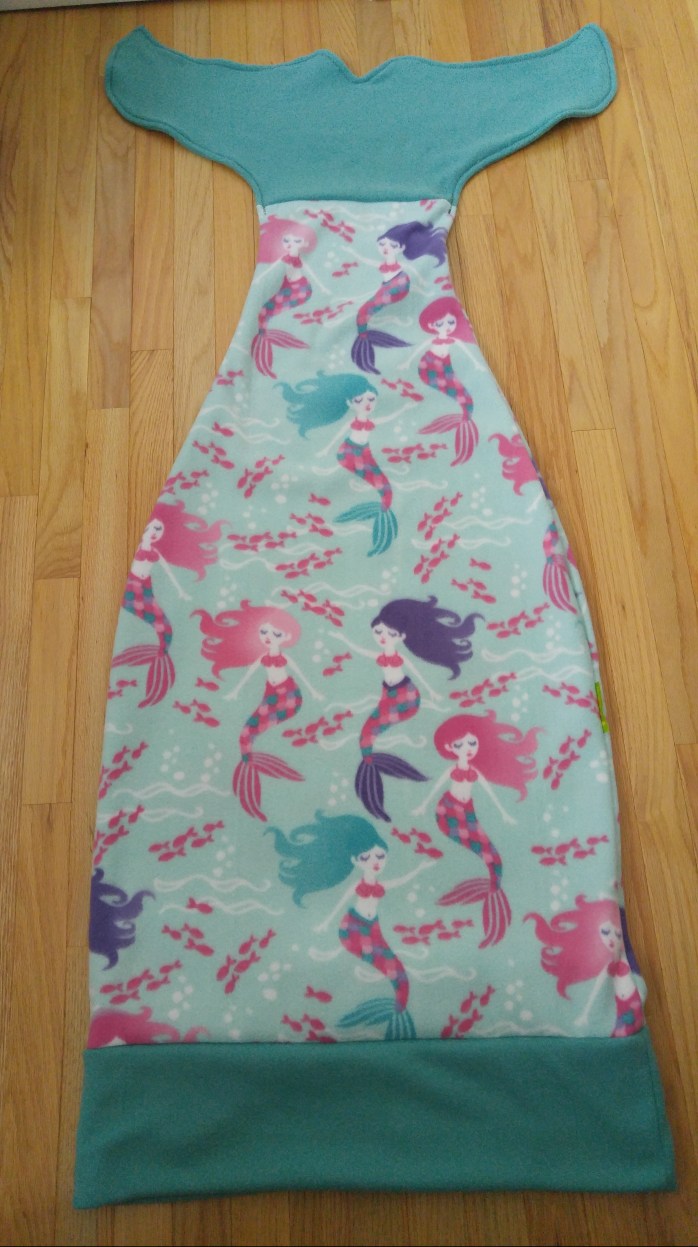
in this example, the fishy patterned material is the mouth, and the solid blue is the body. - Next, sew each fin to each body piece. Lay the fin, wrong side up on top of the right side up body piece (the mouth is already sewn on to the body, and you should not be able to see the raw edges or stitching) so that the skinny ends of each match up. Backstitch at each end.
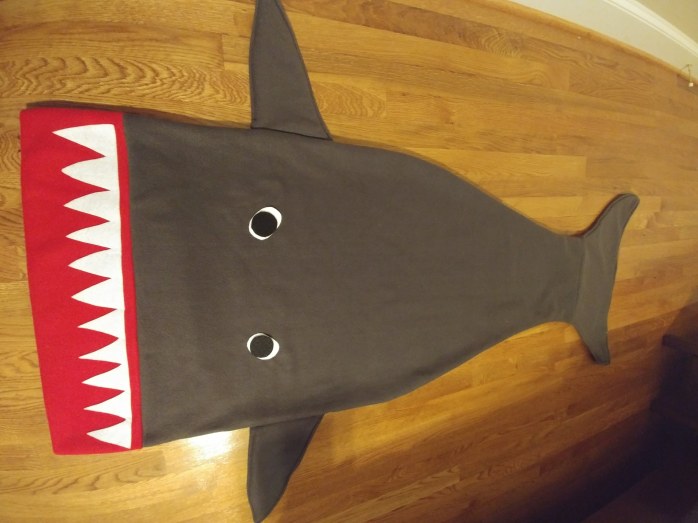
- If you’re making a shark or some other animal with eyes, sew the eyes on the body at this point. I did not sew on the teeth, I just used the already sticky backing to hold those on. However, if you want to sew them on, I’d recommend sewing them BEFORE you sew the mouth onto the body. This way, you’re only sewing through one layer of material instead of two.
- If you’re wanting side fins, it’s time to make these too. Draw a large triangular shape onto your wrapping paper, (10″ long on the two longer sides and 7″ on the short end.) Cut four pieces of material in that shape. Sandwich two fins together, wrong sides together and sew a zigzag stitch on the two long sides, about a quarter of an inch from the edge. Leave the short end open, and then turn the fins right side out.
 vary the tail fins if you want!
- Now it’s time to turn this thing into a whole blanket! Match up your body pieces together, with the right sides facing each other, wrong sides out. If you have fins, place your fins INSIDE so that the open edge matches up to the open edge of the two body pieces. If it helps you understand how to place the fins, imagine the shark is laying in a coffin with his fins over his chest. Pin them in place so they don’t move when you sew it all together. Using the zigzag stitch, sew a half inch all the way around, starting on one side of the mouth, being sure to backstitch. You should finish on the other side of the mouth, obviously do NOT sew the top of the mouth or you won’t be able to get inside!
- Turn your blanket right side out. To make the tail fins and side fins lay flat, you may want to stitch over them, about a quarter of an inch all the way around using a straight stitch.
- Get ready for one excited kiddo!
The MOPS blog article I wrote entitled Love Times Two

The Laughing Gateau

